An OTR wheel cracks, and your first instinct is to blame the weld. You order inspections and metallurgical reports, but the real cause is a fundamental misunderstanding of how wheels handle stress.
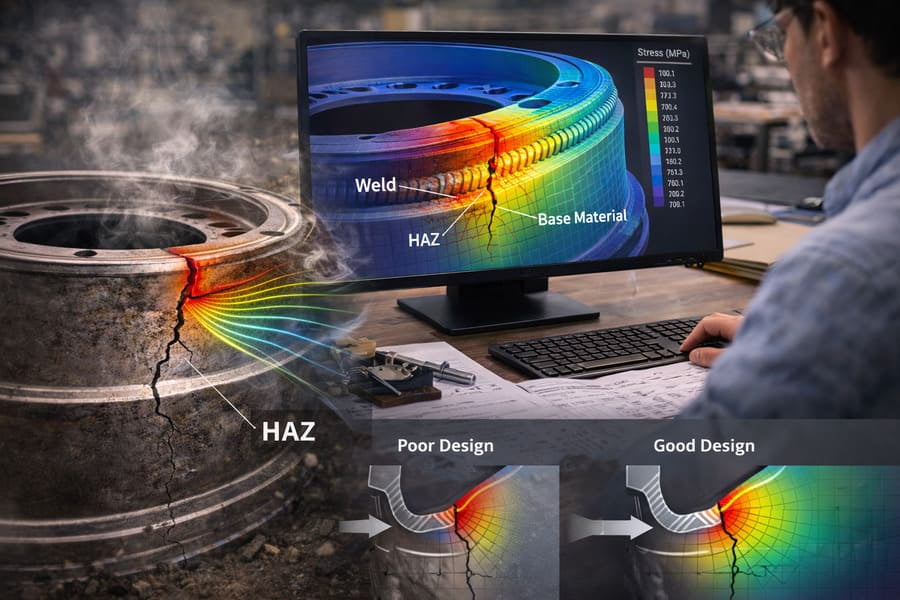
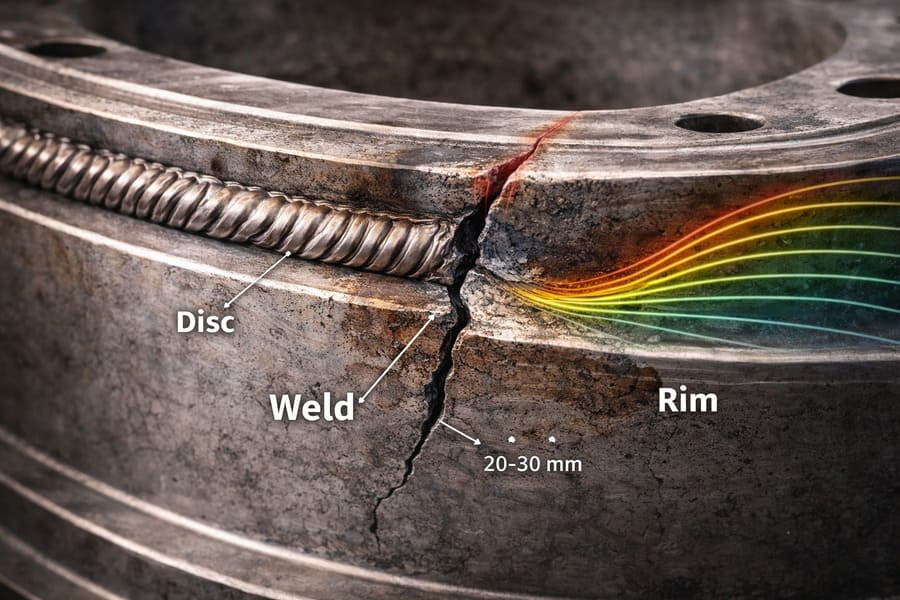
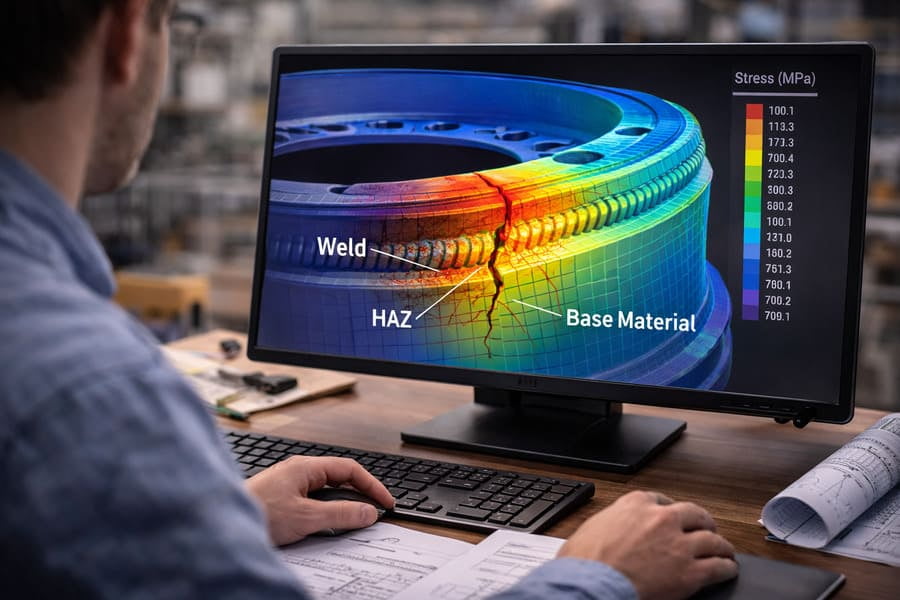
OTR wheels1 fail not because of a weak weld, but because the weld is too stiff. This stiffness forces operational stress into the softer adjacent metal, the Heat-Affected Zone (HAZ)2, which is where fatigue cracks3 actually begin, typically 10-30 mm away from the weld itself.
For over 12 years, I've analyzed wheel failures with clients. The pattern is always the same: a crack appears near a weld, and everyone assumes the welding was faulty. But when we look closer, the weld itself is perfectly intact. The problem isn't the quality of the weld; it's the physics of what happens right next to it. This is a crucial distinction that separates experienced suppliers from those who just sell a product. Let's dive into why this happens.
Isn't a Stronger Weld Supposed to Be Better?
You've invested in wheels with high-quality, certified welds for maximum strength. Yet, a failure occurs right beside that very weld, leaving you confused and questioning your supplier's quality control.
The weld isn’t weak; in heavy-duty wheels, it's one of the stiffest zones. It resists deformation and flexing, while the surrounding base material is designed to have some give. This difference is the root of the problem.
Think of it like this: you have a flexible rubber ruler, and you glue a small, rigid steel plate to the middle of it. When you bend the ruler, where does it look like it's going to snap? Not on the steel plate, but right at the edge of it where the flexible rubber meets the rigid steel. The weld in an OTR wheel acts like that steel plate. The process of welding creates a very hard, stiff zone. While this makes the joint strong, it also fundamentally changes how the wheel behaves under load.
Stiffness: The Unseen Force
The issue isn't strength but the mismatch in stiffness. This is a design and material science4 problem, not a simple quality defect.
- The Weld Zone: Welding melts and re-solidifies steel, creating a cast structure that is typically much harder and stiffer than the original rolled steel of the disc and rim.
- The Base Material: The disc and rim are made from steel designed to have a specific amount of ductility and flexibility5, allowing them to absorb and distribute loads across the entire structure.
- The Conflict: When the wheel flexes under thousands of tons of load, the stiff weld refuses to bend along with the rest of the components. This creates a point of massive stress concentration6 right where the stiff weld ends and the more flexible base material begins.
Where Does the Stress Go if Not into the Weld?
Your machine is carrying a heavy load, putting immense pressure on the wheels. If the super-strong weld isn't absorbing that stress, where is all that force being channeled?
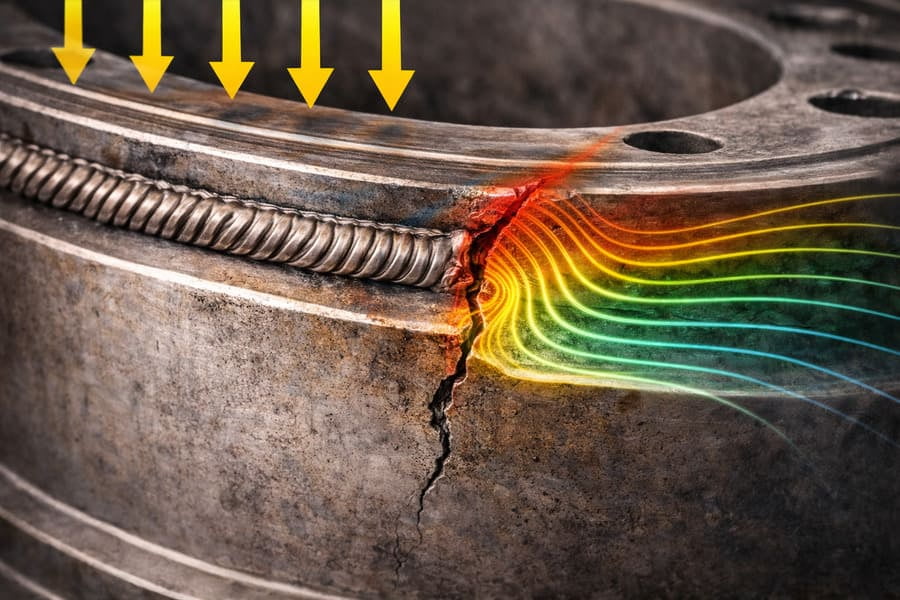
Stress follows changes in stiffness. Since the load isn't shared evenly, the rigid weld acts like a dam, pushing the cyclical stress into the nearby base material. This small area is forced to handle a disproportionate amount of the load.
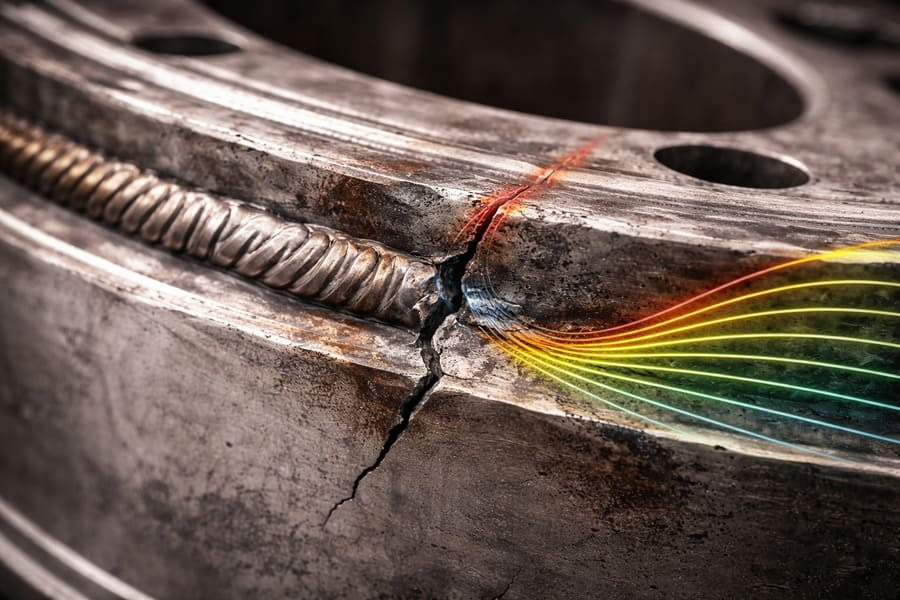
This phenomenon is why cracks almost never form on the weld, but rather right next to it. I've personally inspected dozens of failed wheels where the weld bead is pristine, but a crack has formed in the disc, about half an inch away. This area is known as the Heat-Affected Zone (HAZ)2. It's the part of the base metal that didn't melt during welding but was heated enough to change its grain structure, often making it more brittle than the surrounding metal but less stiff than the weld itself. It becomes the sacrificial zone.
The True Point of Failure
The crack location tells the whole story. It's not random; it's a predictable result of how stress behaves.
| Zone | Stiffness | Role in Failure |
|---|---|---|
| Weld Bead | Very High | Resists bending, acts as a rigid point. |
| Heat-Affected Zone (HAZ)2 | Moderate/Variable | Experiences massive stress concentration6 as the "hinge" between the weld and base metal. This is the primary failure location. |
| Base Material (Disc/Rim) | Designed Flexibility | Flexes as intended, but is overloaded in the area next to the HAZ. |
The most critical area for fatigue life is the 10–30 mm zone right beside the weld. This is where the battle between stiffness and flexibility is lost, cycle after cycle, until a crack forms.
Is Improving Wheel Life About Welding or Design?
You're trying to prevent future failures, so you demand better weld quality7 and more inspections from your supplier. But this approach won't solve the underlying problem because you're focusing on the symptom.
OTR wheel life is determined by stiffness transition8, not just weld quality7. Failures come from abrupt changes in stiffness between components. A crack near the weld is a result of design—it is not the cause of the failure.
A good supplier understands this. Instead of just making a "stronger" weld, we focus on managing the transition in stiffness. This involves advanced design considerations9. For example, the shape of the components, the thickness of the steel, and the specific welding process can all be optimized to create a more gradual change from stiff to flexible. This smooths out the stress, distributing it over a wider area instead of concentrating it on one small, fatal line. This is the difference between simply manufacturing a wheel and engineering a reliable solution.
Shifting Focus from Manufacturing to Engineering
To get a truly reliable wheel, you must look beyond basic QC checks.
- Poor Design: An abrupt angle between the disc and rim creates a natural stress riser. Even a perfect weld can't fix this.
- Good Design: A smooth, gradual transition in geometry allows stress to flow more evenly.
- Expert Manufacturing: Uses welding techniques10 and heat treatments that minimize the severity of the HAZ, creating a "softer" edge to the stiff weld zone.
Thinking about "bad welding" is a trap. The real question you should ask your supplier is, "How have you engineered this wheel to manage stiffness transition8s?"
Conclusion
Stop blaming the weld. A crack near the weld is a design and engineering issue. True wheel reliability comes from managing stiffness transition8s, not just from passing a weld inspection.
Understanding OTR wheels is crucial for grasping their design and failure mechanisms. ↩
Learn about HAZ to understand its role in wheel failures and material properties. ↩
Discover the mechanisms behind fatigue cracks to prevent failures in engineering. ↩
Material science is fundamental to understanding how materials behave under stress. ↩
Understanding ductility and flexibility is key to selecting the right materials for applications. ↩
Understanding stress concentration helps in designing more reliable structures. ↩
Explore the importance of weld quality in engineering and its impact on performance. ↩
Learn about stiffness transition to improve design strategies and material selection. ↩
Explore essential design considerations that enhance the durability of components. ↩
Understanding welding techniques can lead to better performance and reliability. ↩